


How to Remove Price Stickers: 7 Methods That Actually Work
You know the frustration. You bring home a new picture frame, a set of glassware, or a gift you’re excited to wrap — and there it is. A price sticker that refuses to budge. You pick at the corner with your fingernail. It tears. You rub the residue with your thumb. It smears into a gray, sticky smear that somehow spreads instead of disappearing.
Before you reach for the nearest sharp object (don’t), take a breath. The sticker isn’t the enemy — the adhesive is. And once you understand what you’re up against, removing it becomes a lot less frustrating.
Why Price Stickers Are So Hard to Remove
Not all stickers are created equal. The price tag clinging to your new coffee mug was almost certainly printed on permanent pressure-sensitive adhesive — an acrylate-based glue engineered to do one thing extremely well: stay put.
When the sticker is pressed onto a surface, the adhesive flows into the material’s microscopic pores and ridges, creating a mechanical lock. On smooth surfaces like glass, the bond is purely chemical — the glue sticks to the surface at a molecular level. On porous surfaces like unfinished wood or cardboard, it’s even stronger: the glue physically seeps into the fibers and hardens there.
Retailers prefer permanent-grade stickers for a reason beyond just keeping prices legible. Tamper-evident labels — the kind with security cuts that tear if you try to peel them — are a theft deterrent. A sticker that peels off cleanly can be lifted and reattached to a pricier item. So stores use aggressive adhesive by design. The sticker that’s ruining your afternoon is actually doing exactly what it was manufactured to do.
The good news? That same adhesive chemistry also tells us how to defeat it. Heat, solvents, and oils each attack the bond in a different way. Pick the right tool for your surface, and the sticker comes off clean.
7 Proven Methods to Remove Price Stickers
Before you dive in, here’s a quick framework to save you time: the best method depends on three things — how long the sticker has been there, what surface it’s stuck to, and what you have on hand. Fresh stickers (less than a month old) almost always yield to the tape method. Glass and metal love heat. Plastic and painted surfaces play safest with oil. Use the guide below, then jump to the surface-by-surface table if you just want the short answer.
Fresh (<1 month)? Try Tape Method first
Glass or metal? Heat Method is your go-to
No special tools? Cooking oil works on almost everything
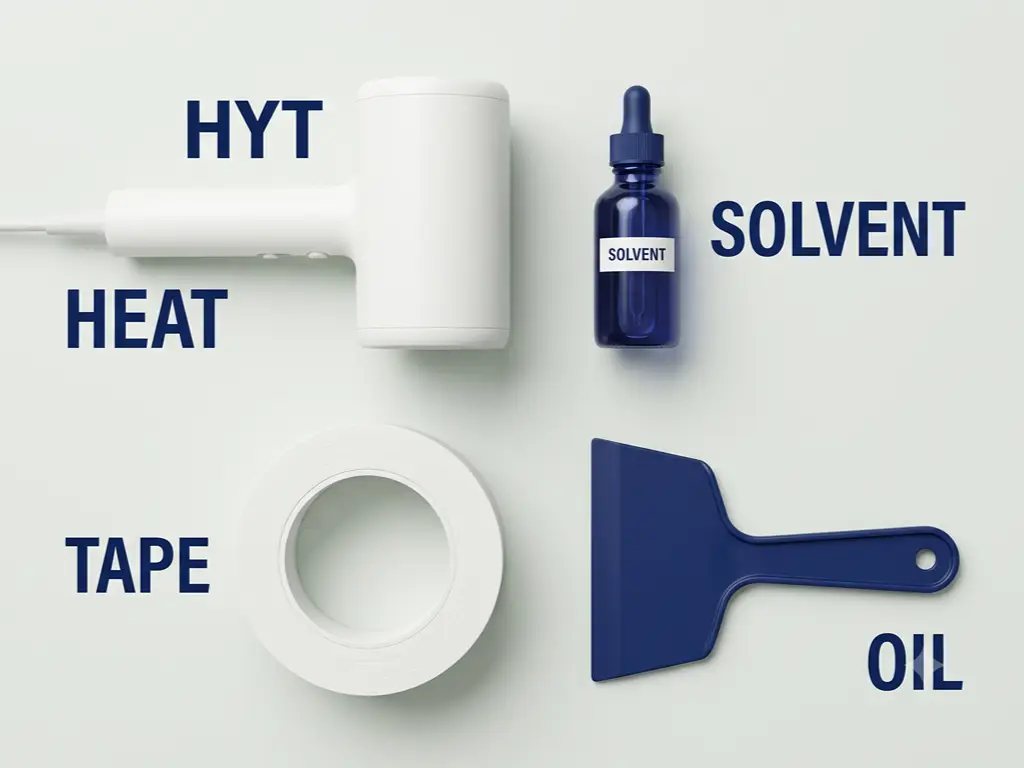
Heat Method (Hair Dryer or Heat Gun)
This is the method to try first. It works on most hard surfaces, requires no chemicals, and has the highest success rate for stickers that have been in place for months or even years.
Set your hair dryer to medium-high heat (approximately 60–80°C) and hold it about 10 to 15 centimeters from the sticker. Keep it moving — don’t hover over one spot. After 20 to 30 seconds, the adhesive layer underneath will soften. You’ll sometimes see the sticker’s edges lift slightly. That’s your cue: start peeling from one corner, slowly and steadily.
For stickers that have been stuck for two years or more, you may need up to 60 seconds of heat. If using a heat gun, keep the temperature at or below 120°C and maintain at least 20 centimeters of distance. Anything hotter risks warping plastic or blistering painted finishes.
Think of it like warming honey. Cold honey is thick and stubborn, but run the jar under warm water and it pours easily. Heat doesn’t burn the sticker off — it temporarily relaxes the adhesive so the label releases in one piece.
Rubbing Alcohol and Acetone (Nail Polish Remover)
When heat doesn’t work — or when you’re dealing with the ghostly residue left behind after a partial peel — solvents are your next line of defense.
Rubbing alcohol (isopropyl alcohol, 70–91%) is the gentler option. Soak a cotton ball, press it firmly onto the sticker, and hold it there for two to three minutes. The alcohol dissolves the adhesive’s bond at the surface interface. Counterintuitively, 70% alcohol often works better than 91% for sticker removal — it evaporates more slowly, giving it more dwell time to penetrate the adhesive layer.
Acetone (nail polish remover) is the heavy artillery. It dissolves adhesives faster than alcohol, but it comes with a strict warning: acetone will melt or permanently cloud ABS plastic, acrylic, painted surfaces, and acetate. If you’re unsure what your item is made of, skip the acetone. Always test on a hidden spot first, work in a ventilated area, and wear gloves — acetone strips natural oils from your skin on contact.
Oil-Based Methods (Cooking Oil, WD-40, Goo Gone)
Oil-based methods are the safest chemical option — they work on virtually every surface, including plastics and painted finishes that would be destroyed by acetone. The trade-off is time: you need patience.
Cooking oil (olive, coconut, vegetable) is the “I need this done now with what’s in my kitchen” option. Apply a generous layer over the sticker, let it sit for 10 to 15 minutes, then use a plastic scraper or an old credit card to lift the softened label. Wash the area afterward with dish soap and warm water — residual oil attracts dust and leaves a film.
WD-40 penetrates faster thanks to its hydrocarbon solvent base. Spray it on, wait about five minutes, and the adhesive bond weakens significantly. Same post-cleanup rule applies: wash off the oily residue.
Goo Gone is the specialist tool. Its active ingredient, d-limonene (extracted from citrus peels), specifically targets acrylate-based adhesives — the exact type used on most price stickers. It’s more effective than household oils and leaves less residue, but it’s a dedicated purchase rather than something you already own.
If your first method didn’t work, don’t reach for something sharper — reach for something different. Heat softens what oil can’t reach. Oil penetrates what heat can’t loosen. Switch categories before escalating force. And always check the surface table below before grabbing acetone.
The Tape Method (Quick Fix for Fresh Stickers)
If the sticker has been on for less than three months and the surface is fairly smooth, try this first — it costs nothing and takes seconds.
Take a strip of packing tape (not the thin transparent kind — you need the wide, high-tack brown or clear tape), press it firmly over the entire sticker, and burnish it down with your fingernail so there are no air gaps. Leave a small folded tab at one corner. Then, in one swift motion, rip the tape off parallel to the surface.
The physics is simple: the tape’s adhesive is stronger than the sticker’s adhesive (at least temporarily), so the sticker rides the tape off the surface. On glass and glossy plastic with stickers less than three months old, this works more than 80% of the time. On stickers older than six months or on textured surfaces like matte plastic or wood grain, the success rate drops sharply — the aged adhesive has cured to a harder, more chemically resistant state that tape alone can’t overcome.
Scraping (Plastic Scraper or Credit Card)
Sometimes you need to go physical — especially when the sticker is already half-peeled, brittle, or has been pre-softened by heat or oil.
Use a plastic scraper, an expired credit card, or a nylon spudger. Hold it at a 30 to 45-degree angle to the surface and push forward along the sticker’s edge — not perpendicular into it. The goal is to wedge under the adhesive layer and lift, not to chisel at it head-on.
Never use a metal blade, box cutter, or steel wool. Metal is harder than almost every consumer surface — including glass (where metal leaves micro-scratches that feel rough to the touch) and definitely plastic (where a single pass of a razor blade leaves visible, permanent grooves). If you’re working on glass and a plastic scraper isn’t cutting it, pair it with heat or oil rather than escalating to metal.
White Vinegar (Natural Alternative)
If you’re cleaning in a kitchen, around children or pets, or simply prefer to avoid synthetic chemicals, white vinegar is worth a try — with realistic expectations.
Soak a paper towel in standard white vinegar (4–7% acetic acid), press it onto the sticker, and leave it for 10 to 15 minutes. The mild acid can soften some water-based adhesive layers. Then wipe and scrape as usual.
The catch: vinegar works best on water-soluble adhesives. Most permanent price stickers use acrylate-based adhesives, which are oil-soluble — not water-soluble. If your sticker has a glossy, plastic-like top coating (which most price stickers do), the vinegar can’t even reach the adhesive layer underneath. Use vinegar as a gentle first attempt, not as your only plan.
Melamine Sponge (Magic Eraser) — For Residue Only
This one is a residue-removal tool, not a sticker-removal tool. If you’ve already peeled the paper label off but are left with a dark, gummy rectangle of adhesive that won’t wipe away, reach for a melamine sponge.
Dampen the sponge, squeeze out the excess water, and rub the residue in small circles with light pressure. The adhesive will crumble and lift away.
Here’s the warning you won’t find on the package: melamine foam is an abrasive. It works like ultra-fine sandpaper (approximately 4 on the Mohs hardness scale). On glass (5.5 Mohs), you’re safe — the glass is harder than the sponge. On glossy plastic, car paint, or high-gloss wood finishes, the sponge will leave permanent dull, matte patches that cannot be polished out. Test on an underside or back corner before committing.
Surface-by-Surface Quick-Reference Table
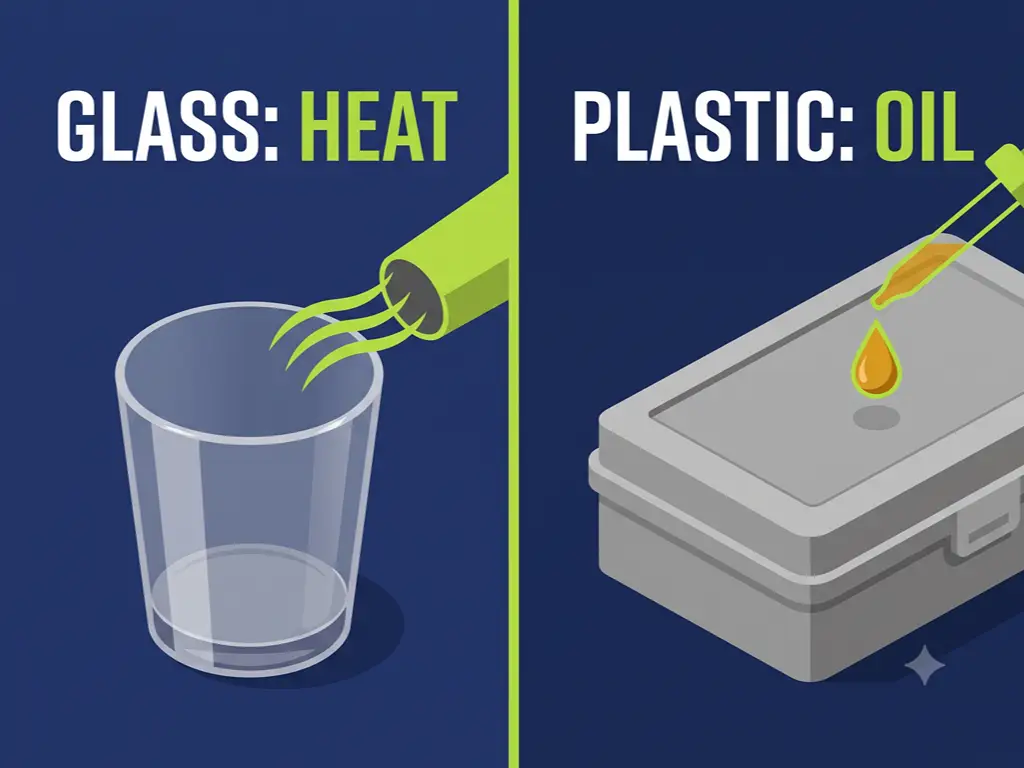
If you’ve skimmed the methods and just want the answer for your specific item, here it is. Find your surface, try the preferred method, fall back to the alternative if needed, and stay away from the “never” column.
| Surface | Preferred Method | Alternative | Never Use | Notes |
|---|---|---|---|---|
| Glass / Ceramic | Heat (hair dryer) | Rubbing alcohol, Magic Eraser | Metal scraper | Glass is forgiving; most methods work. Soak in warm soapy water first for jars and bottles. |
| Stainless Steel / Metal | Heat + plastic scraper | WD-40, Goo Gone | Steel wool, metal blades | Metal handles most methods well. Avoid anything that scratches the grain or finish. |
| Glossy Plastic | Tape method (fresh) or cooking oil (old) | Rubbing alcohol (70%) | Acetone, Magic Eraser | Acetone melts plastic. Magic Eraser scuffs gloss to matte. Test alcohol on a hidden edge first. |
| Matte / Textured Plastic | Cooking oil + plastic scraper | WD-40 | Acetone, Magic Eraser, metal scraper | Texture makes tape method ineffective. Oil penetrates textured surface better. |
| Painted Wood / Furniture | Hair dryer (gentle, 60°C max) | Goo Gone | Acetone, heat gun, Magic Eraser | Heat gun can blister paint. Acetone strips clear coat. Always test on an underside first. |
| Raw / Unfinished Wood | Hair dryer (gentle) | Cooking oil | Any solvent (alcohol, acetone, WD-40) | Solvents soak into raw wood and can discolor permanently. Physical methods only. |
| Paper / Cardboard | Do not attempt removal | — | Heat, solvents, scraping | Adhesive has penetrated paper fibers. Removal will tear the surface. Accept the sticker or cover it. |
| Fabric / Clothing | Rubbing alcohol (70%, dab gently) | Goo Gone (spot-test first) | Heat, acetone, WD-40 | Heat can set the adhesive deeper. Wash immediately after treatment. |
What NOT to Do When Removing Price Stickers
Knowing what to avoid is half the battle. Here are the four most common mistakes — and why they backfire.
Don’t grab a metal blade. That box cutter or kitchen knife will leave scratches on glass, gouges on plastic, and permanent scars on coated surfaces. A plastic scraper costs a dollar and does zero damage. The “just be careful” approach doesn’t work — metal is harder than your item’s surface, and even light contact leaves marks.
Don’t pour acetone straight onto plastic. Acetone doesn’t just damage plastic — it dissolves it. ABS, acrylic, and many painted finishes will turn cloudy, soft, or sticky on contact. If you must use acetone, apply it with a cotton swab to the sticker only, and never let it pool on the surrounding surface.
Don’t blast a heat gun on high from close range. A heat gun at 200°C held 5 centimeters from ABS plastic will soften and deform the material in under 10 seconds. Start low, stay back (20 centimeters minimum), and check the surface temperature with the back of your hand before proceeding.
Don’t spray WD-40 and call it done. The sticker might come off, but the oily residue left behind acts like a dust magnet. Within days, the area will look dirtier than before. Always follow up with dish soap, warm water, and a clean cloth.
The 4 Rules to Protect Your Surfaces
Use a plastic scraper instead — it costs a dollar and won’t scratch any surface
Acetone dissolves ABS, acrylic and painted finishes on contact
Keep 20cm distance minimum — 200°C at close range deforms plastic in seconds
Always wash off oily residue with dish soap — otherwise it becomes a dust magnet
For Store Owners: When Removing Stickers Becomes a Business Problem
Up to this point, we’ve talked about removing one sticker from one item. But if you run a retail store, you’re not dealing with one sticker. On any given week, you might be changing hundreds — or thousands.
That changes the question entirely. It’s no longer “how do I remove this sticker?” It’s “why am I still removing stickers at all?”
The Hidden Cost of Manual Price Changes
Let’s put numbers to what most store owners feel but never measure.
A mid-sized supermarket with 10,000 to 15,000 SKUs handles between 3,500 and 9,000 price changes every week — that includes promotions, supplier-driven adjustments, clearance markdowns, and regular price updates. Each change follows the same cycle: locate the product on the shelf, peel off the old sticker, clean any residue, apply the new label, verify it matches the system price, and move on. A single tag swap takes 30 to 40 seconds.
Multiply that across a week: 50 to 60 labor hours, every week, spent on nothing but sticker swaps. At a blended US retail wage of $18 to $21 per hour, that’s $800 to $1,000 per week — per store — walking up and down aisles peeling paper.
And that’s just the labor. It doesn’t account for the price tags themselves (label stock, printer ribbons, and gun maintenance run $5,000 to $7,000 annually for a mid-sized store), the errors that slip through when a shelf price and register price don’t match, or the markdowns that go up late because someone couldn’t get through all the aisles in time. Those late markdowns on perishable goods translate directly to shrink — food that gets thrown out instead of sold at a discount.
How Major Retailers Are Solving This
The industry is moving, and it’s moving fast.
Walmart is in the middle of deploying electronic shelf labels (ESLs) across 2,300 US stores by the end of 2026, a rollout that turns a two-day price update cycle into a process measured in minutes (Inc., 2025). In Europe, the transition is already mainstream — Norwegian discounter REMA 1000 changes prices up to 100 times a day during peak hours using ESL infrastructure, something that would be physically impossible with paper tags.
Smaller retailers are seeing the benefits too. An Irish hardware chain with roughly 2,500 SKUs deployed ESLs and reclaimed 10 to 20 labor hours per week. A single SuperValu supermarket in Ireland eliminated 182,000 sheets of paper in its first year after switching — that’s paper that no longer needs to be printed, peeled, and thrown away (DIGI Ireland, 2025).
An extensive academic study from UC San Diego’s Rady School of Management tracked over 180 million price observations across 114 stores and found no evidence of the “surge pricing” that consumer advocates had feared. ESLs, in practice, are being used for efficiency — not dynamic pricing (UC San Diego Rady School, 2025).
The comparison that keeps coming up among retail operators: ESLs today are where POS systems were 20 years ago. You’re not asking whether to install one — you’re asking when.
Electronic Shelf Labels: The “Never Remove Another Price Sticker” Solution
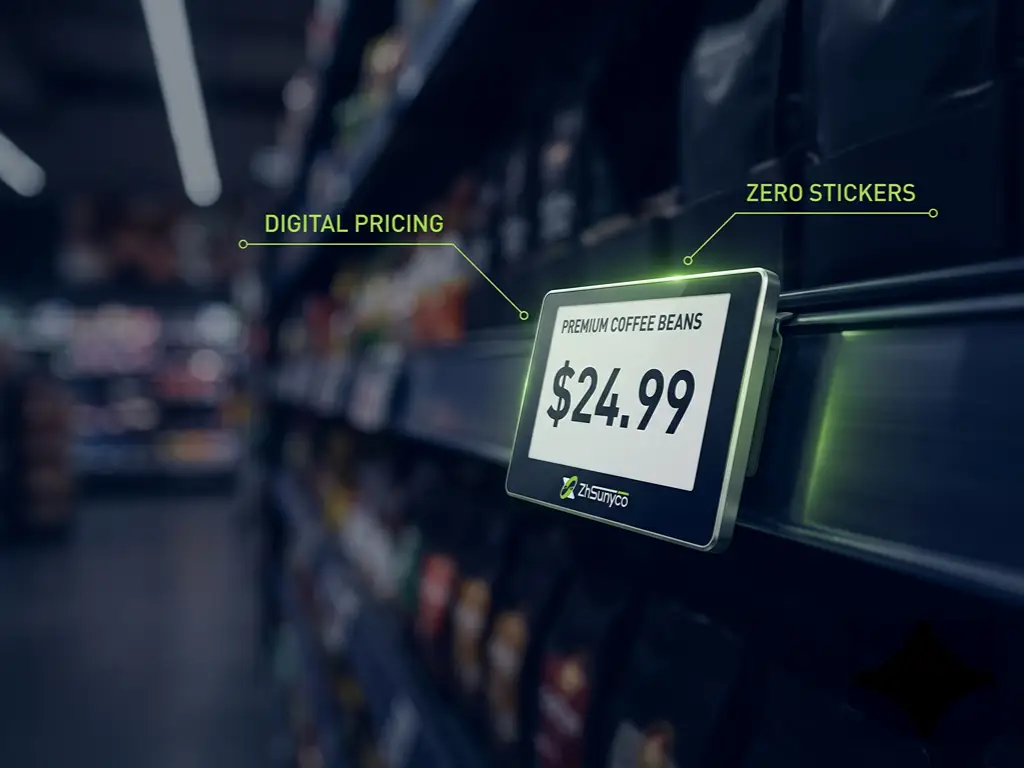
So what exactly is an electronic shelf label? At its simplest, it’s a small e-ink display — the same technology as a Kindle screen — that sits on the shelf edge where a paper tag used to go. Instead of an employee walking the floor with a price gun, a central system pushes price updates to every label simultaneously. One click, and every shelf in the store reflects the new price.
The technology itself is surprisingly mature. E-ink displays are bistable — they only consume power during a refresh, which means a typical ESL battery lasts five to seven years under normal use (around three refreshes per day). The labels communicate with a base station using protocols like 2.4GHz or BLE, and the software layer integrates with existing POS and inventory management systems.
For store owners, the math is straightforward. The upfront investment in ESL hardware is real — typical ROI timelines run 12 to 24 months depending on store size and price-change frequency. But the savings stack on multiple fronts: labor hours redirected from sticker duty to customer service, near-zero pricing errors (no more shelf-to-register mismatches), and reduced consumable costs from eliminating label stock, ink, and printer maintenance. For a mid-sized grocery store, the system often pays for itself within two years and generates net savings after that.
If a full-store deployment feels like too big a leap, the pragmatic entry point is a pilot in your highest-change area — typically the produce section, the dairy aisle, or anywhere promotions rotate weekly. Starting with 300 to 500 labels lets you measure real-world savings before scaling up. Several professional ESL manufacturers offer trial kits and free configuration software specifically for this kind of phased adoption.
Pick the Right Tool for the Job
For the reader who just wants a stubborn price sticker off a picture frame: start with the tape method if the sticker is fresh, move to heat if it’s old, and check the surface table before you reach for any solvent. The right method means no damage, no residue, and no frustration.
For the reader who recognized their store in the numbers above — the weekly hours lost, the consumable costs, the pricing errors — the real question has shifted. You started by googling how to peel a sticker. You ended up staring at a spreadsheet of labor costs, wondering how many of those hours your team could spend on the sales floor instead of the aisles. Sometimes the best way to remove a price sticker is to make sure it’s the last one your store ever needs.
If the operational side of this article made you rethink your store’s pricing workflow, Zhsunyco — a professional electronic shelf label manufacturer with deployments across 400+ retailers in 180 countries — has real-world case studies from supermarkets, pharmacies, and hardware stores that have made the switch. You can browse their deployment stories at zhsunyco.com/case-studies.
See How Retailers Like Yours Switched to Digital Pricing
Browse real-world ESL deployments across supermarkets, pharmacies, and hardware stores — and get a personalized recommendation for your store.
Explore Case StudiesReferences
- Aten, Jason. “Walmart Is Putting Digital Labels That Change Prices Instantly on Every Store Shelf in America.” Inc., 2025. https://www.inc.com/…
- DIGI Ireland. “Hardware & DIY Stores Switching to Electronic Shelf Labels.” 2025. https://digi.ie/…
- UC San Diego Rady School of Management. “New Research Debunks Fears of Supermarket Surge Pricing with Electronic Shelf Labels.” 2025. https://rady.ucsd.edu/…
- Hanshow. “Rising Labor Costs Are Putting Pressure On Supermarket Profits.” https://www.hanshow.com/…
- Zhsunyco. Case Studies. https://www.zhsunyco.com/case-studies/
- Zhsunyco. Homepage. https://www.zhsunyco.com/

 English
  Russian
  Spanish
  German
  Arabic
  French
  Bulgarian
  Polish
  Romanian
  Turkish
  Portuguese